Go to
+44 (0) 330 133 5351
+44 (0) 330 133 5351

Draw Place Blog

df56fd7a619a70f4fff1281e7eee664a

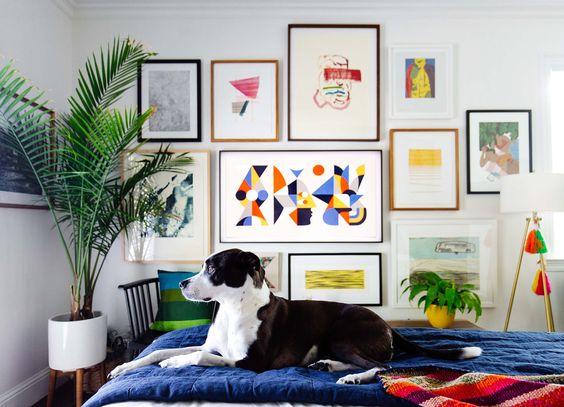
If you want to get some useful tips on how to hang paintings, how to arrange them into one coherent composition, and how high you should hang them, keep reading!

Here are our tips on decorating your interior with pictures and paintings:

1. Arrange your pictures on the floor or against the wall before you start hammering in nails – this will help you see the whole composition and choose the final layout.

2. Determine the surface that will be taken up by the finished arrangement and keep it under 2/3 of the wall’s surface.
 
3. To make your pictures truly stand out, hang them on a light wall – it can be completely white, painted in pastel shades or covered with light wallpaper.

4. Horizontal pictures will make the wall look longer while vertical paintings will visually lift the ceiling.

5. It’s important to hang your pictures at the right height to make sure they are easy to see. Use the imaginary line passing right through the middle of a picture as a guide. The classic “museum style” approach is to hang the picture at 152 cm from the floor to this imaginary midline.

6. Consider hanging the pictures lower in the kitchen and the dining room, since you will likely be sitting at a table, not standing when you observe them.

7. If you don’t plan on simply placing your picture on the floor and letting it lean against the wall, don’t hang anything below 60 cm.

Interior picture layout: three basic methods
1. The symmetric approach


Symmetry is very harmonic, bringing a sense of order and allowing the viewer to comfortably take in the entire composition and making the home feel cosier. The pictures are hung to create a mirror image on every side of an imaginary midline. The bottom line can be aligned at the same height, or at a different height too – in that case, the pictures are hung on an imaginary horizontal midline.

2. Top or bottom alignment

You can choose to align pictures either at the top or the bottom line – you’ll be surprised how good it looks, giving the composition an anchoring point and a sense of stability and order.

3. The asymmetric approach


Asymmetry brings in a live dynamic sense, grabs the viewers attention and pulls everyone’s eyes to the wall and the composition. It also allows you to combine different picture sizes and formats, forcing you to think carefully about the entire layout. 

Keep in mind that creating a good asymmetric composition is not easy, requiring a keen sense of composition.

 

aecb0c21a8f2828de1a76cc4cce3ae1d

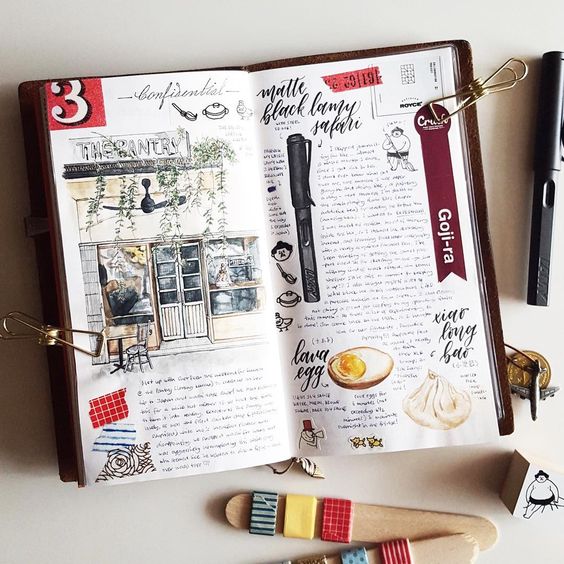
Sometimes you really want to draw something, but just can’t decide what and end up not drawing anything at all because of how unmotivated you become by the undecidedness. Sound familiar? We know that feeling too, and that’s why we have put together a list of 25 topics and ideas for when you get that sketching itch. 

  • City sketching – capture some of your favourite places 
  • Quick sketches of people on public transport
  • Put your dreams and ambitions on paper
  • You can never go wrong with a self-portrait
  • Create your own world in your own comic strip – and don’t get discouraged if it doesn’t look like a Marvel or DC production 
  • Make fun of your friends and draw their caricatures
  • Make a study of the human body – try skull or muscle anatomy, or a hand – few things are more difficult to do well than hands
  • Recreate your favourite moments from movies or series
  • Try bringing some flora and landscape into your sketchbook, and if you love being outside, take your sketchbook with you
  • Imagine you are a graphic designer and create a new logo for your favourite band
  • Draw a place that you’d like to visit someday
  • A still life is always a great option – find inspiration in the items around you, inside the fridge, or try copying a picture from the internet
  • Try making some cool tattoo designs
  • Whip up some fun clothing prints – what would your own t-shirt look like?
  • Try capturing your future the way you want it to be
  • Create illustrations for your favourite book
  • Empty your purse or pockets and draw what you see – this is also an exercise you get to try at our sketching course 😊
  • Design whatever you feel like – from a piece of furniture to an entire room
  • Try your hand at architecture, starting with simple scenes and working your way to full streets and blocks
  •  
  • Draw some food (not recommended when you’re hungry, though 😊)
  • Draw scenes from a normal day in your life
  • Capture your workplace or workspace
  • Spend some time just doodling (draw pictures or patterns without focusing on them but instead thinking of other things) – you may be surprised with the results
  • What was the best day of your life? Try putting that amazing memory on paper
  • And most importantly – draw things that make you happy 😊

Do you want to learn to capture the world around you? Come learn all the sketching tricks with us! It’s not nearly as hard as it might seem and soon enough you’ll be able to capture items, food, streets, nature, and people with quick sketches!


Colour mixing theory

10. February 2022

MicrosoftTeams-image

Painting is more than just applying pigment to a canvas, and the way you mix colours is just as important as your style or technique. Choosing the right shades can greatly affect the emotions conveyed by your painting – just think of Picasso’s “Blue Period” works. Would they have the same effect without those blue tones?

Whatever medium you are using, understanding and learning to mix colours properly is key. Most beginner artists tend to use only the colours that come directly out of the paint tube, but these shades are often oversaturated, flat, or simply unnatural. By learning to mix colours, you can create much more beautiful shades and save some money on top of that too since you won’t need to purchase a tube of every colour you might want to use.

To help you truly master the art of colour mixing, we put together a simple colour theory overview.


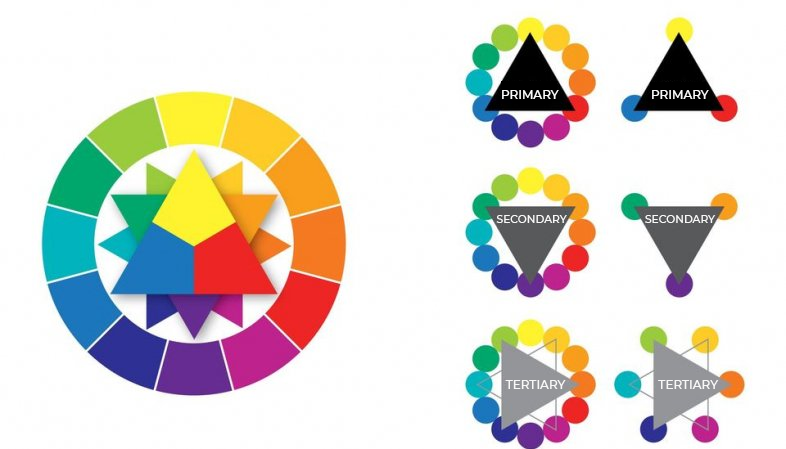
  • PRIMARY COLOURS 


The primary colours are blue, yellow, and red. All other colours are created by mixing these three together, so if you want to keep your palette minimal, primary colours are a must since you can mix any other shade using just them.


  • SECONDARY


When you mix two primary colours together, you get a secondary colour. Red and blue result in purple, blue and yellow in green and finally, red and yellow will result in orange.


  • TERTIARY 


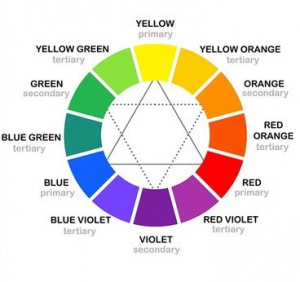
As the name suggests, tertiary colours are created by mixing primary and secondary colours. There is a total of six tertiary colours: vermilion (red–orange), amber (yellow–orange), chartreuse (yellow–green), teal (blue-green), violet (blue–purple), and magenta (red–purple). These shades can vary, and you are free to adjust them as you see fit. For instance, you can make your vermilion more yellow and less orange by working with ratios of each composite colour.

Colours are all about ratios, and one shade can look very different depending on how you mix it. Always keep the colour wheel and each colour’s position in mind when pairing and mixing different shades. The colours that are opposite of one another on the wheel are complementary colours, which means that red and green, blue and orange, and purple and yellow will always look great together.

Colour mixing is a bit of a mysterious discipline, like alchemy, and it certainly requires a lot of practice to go with the theory. Join us at our oil painting course for beginners and learn the secrets of colour mixing with us!

https://drawplace.drawplanet.cz/kurz/kurz-kresleni-a-malovani-pro-uplne-zacatecniky/

How to draw a rose

9. February 2022

как-нарисовать-розу-27

Roses are one of the most popular flowers out there, often considered to symbolise love. Composed of many layered petals, they are notoriously hard to draw since you have to work in layers too before you can move on to shading.

You will need:

  • A hard pencil (like HB)
  • A medium pencil (2B or slightly softer)
  • A soft pencil (5B or softer)
  • A sheet of paper
  • A pencil sharpener

Step 1
Use a hard pencil to draw a drop or egg-shaped outline – this is the inside of the rose, the bud.

Step 2
Draw the “opening” part.

Step 3
Add petals inside.

Step 4
Think of a heart shape when drawing these petals; they will also work as the edge of the other petals.

Step 5
Connect the “heart” to the rest of the bud to create a petal shape.

Step 6
Draw another heart, this time connecting it to the lower part of the bud.

Step 7
Draw another heart, making it more open and less smooth this time.

Step 8
Now it’s time to add more petals. Think carefully before adding each of them – too many will only cause you to get lost in the picture.

Step 9
Now it’s time to plant the bud into a “bowl” of petals. Start by adding small petals and continue working, adding more and more of them.

Step 10
As you add petals, make sure to make them point more and more downwards, as if they were almost laying down.

Step 11
Once you are satisfied, put a bit more pressure on the pencil in the areas that you want to accentuate with shading to mark them

Step 12
Now grab a softer pencil and darken the inner parts of the rose. Start with light strokes first…

…then add more pressure to create deeper shadows.


Step 13
Use the same pencil to place dark accents at the tips of the petals, but don’t go over their entire outline!

Step 14
Now use the hard pencil again and use it to add light structure to the parts that are “lit”. The more shaded the fragment is, the crisper your lines should be.

Step 15
Finally, use the softest pencil to add final strokes to the dark parts, especially in the darkest folds.

All done – you know how to draw a rose now!

Would you like to learn to draw other things too? Sign up for our beginners’ drawing course at https://www.drawplanet.cz/kurz/kurz-kresby/ and learn to work with pencils, charcoal, pastels, ink, and other exciting media!

Kak-narisovat-kota-karandashom-pojetapno-1

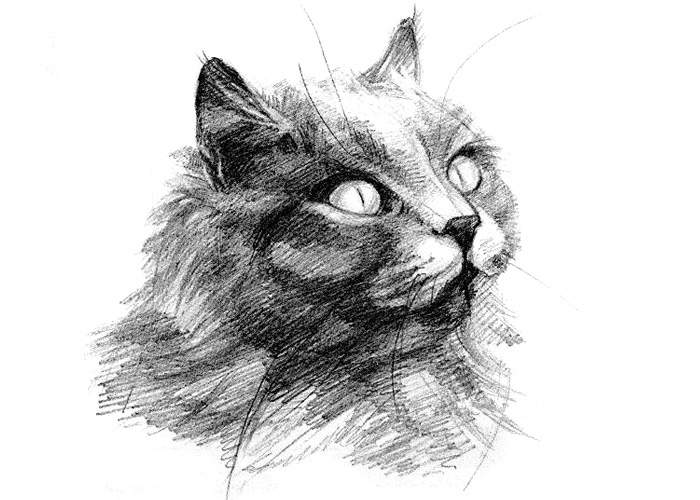
Did you know you can draw a cat in five steps? Follow us and see for yourself! First, you need to determine where the cat’s head is going to be on your paper. Then, draw a big oval with a smaller oval inside and two lines for the cat’s neck. Next, add two parallel lines right above the smaller oval – the cat’s eyes will go between them.

Step two – draw two more ovals for the cat’s eyes, add the ears and try to shape the face to be more catlike. You can see a cat’s face coming together already in the picture below.

Step three – the nose. At this stage, it can be a simple triangle. Our main goal right now is to make sure everything looks even and level, with no elements being askew or looking “weird”.

Step four – adding more details and definition to the cat’s eyes, ears, nose, and mouth. Don’t rush and take it one thing at a time – work on the ears first, then move on to the eyes and finally, to the nose. Use the picture below as a reference and try to mimic what you see.

Finally, in comes hatching and shading! Make sure you have pencils ranging from 2B to 6B at the ready, look at the reference picture below and try to copy the light and dark areas. Look closely and pay attention. Use the 6B pencil for the darkest areas and the 2B pencil for the lightest. That means you will use the 6B around the eyes, mouth, and ears, and the 2B for the eyes themselves. Don’t be nervous about making a mistake – you can always fix it with your eraser.

That’s it, you just drew a cat! Want to learn more? Then our drawing course is just the thing for you! https://www.drawplanet.cz/kurz/kurz-kresby/ Join us at Draw Planet to learn to draw things, animals, people, and much more step by step. Simply click the link, register, and start learning! 😊

IMG_7051

Our newsletter!