Go to

#painting


Embarking on an adventure into the art world often involves traversing cities that serve as hubs for creativity, innovation, and cultural expression. If you’re wondering which cities to explore for an immersive art experience, here’s a curated list that promises to ignite your artistic soul.


Paris, France: The City of Artistic Legacy

Known as the epicenter of artistic movements, Paris stands as a testament to centuries of creative brilliance. From the iconic Louvre housing masterpieces like the Mona Lisa to the vibrant street art adorning the neighborhoods, every corner exudes artistic flair. Don’t miss out on exploring Montmartre, a historic district that has inspired countless artists through the ages.

Musée d'Orsay

Photo of Museum D’Orsey from web

New York City, USA: The Contemporary Art Mecca

For those captivated by contemporary art, New York City is an unrivaled destination. The city’s art scene pulsates with energy, with galleries in Chelsea and the iconic Museum of Modern Art (MoMA) showcasing avant-garde works. Street art in neighborhoods like Bushwick in Brooklyn adds a dynamic and eclectic touch to the artistic landscape.

NYC: Museum of Modern Art (MoMA) Entry Ticket | GetYourGuide

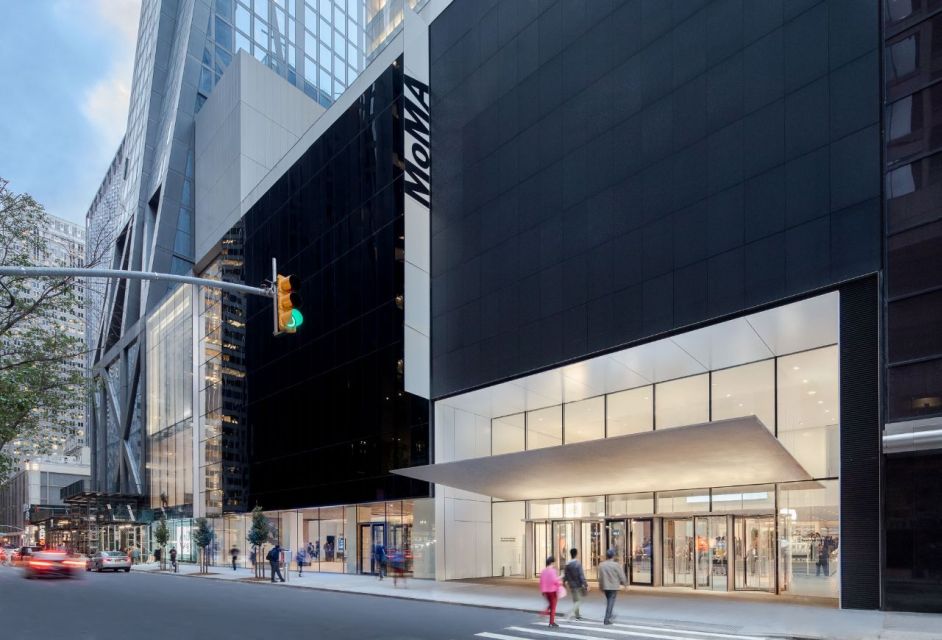
Photo of MOMA from web

Florence, Italy: Renaissance Revival

Stepping into Florence feels like a journey back in time to the Renaissance era. The birthplace of renowned artists like Michelangelo and Leonardo da Vinci, Florence boasts architectural marvels like the Uffizi Gallery and the Accademia Gallery, home to Michelangelo’s David. Every alleyway whispers tales of artistic grandeur.

The Uffizi Gallery Gathers Some Heavy Hitters in a New Room - The New York Times

Photo of Uffizzi from web


Tokyo, Japan: Fusion of Tradition and Modernity

Tokyo’s art scene seamlessly merges tradition with innovation. From contemporary galleries in Roppongi Hills to the serene beauty of ancient art in places like the Nezu Museum, Tokyo offers a kaleidoscope of artistic experiences. Don’t miss teamLab Borderless, an immersive digital art museum that redefines boundaries.

NEZU MUSEUM — Hello! Tokyo Tours

Photo of Uffizzi from web


London, UK: A Canvas of Artistic Diversity

London’s art scene is synonymous with its world-class museums and galleries. The British Museum houses a staggering collection spanning centuries and continents, including the Rosetta Stone and the Elgin Marbles. The National Gallery showcases European masterpieces, featuring works by Van Gogh, da Vinci, and Turner.

Room 32 reopens to the public after a 21-month refurbishment | Press  releases | National Gallery, London

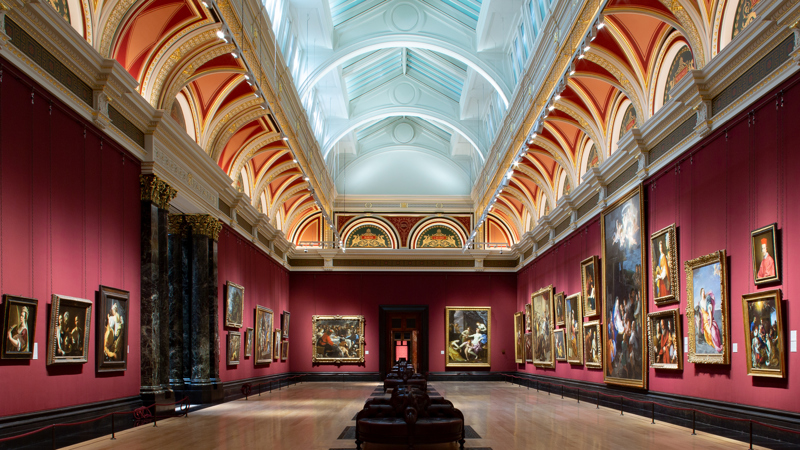
Photo of The National Gallery from web

Venture into East London’s streets, particularly Shoreditch and Brick Lane, to witness a thriving street art scene. Colorful murals and graffiti adorn walls, telling stories of local culture and global trends. Additionally, unconventional art spaces like the Whitechapel Gallery and the Serpentine Galleries provide platforms for experimental and boundary-pushing art forms.

Radical Figures at the Whitechapel Gallery — Roman Road LDN

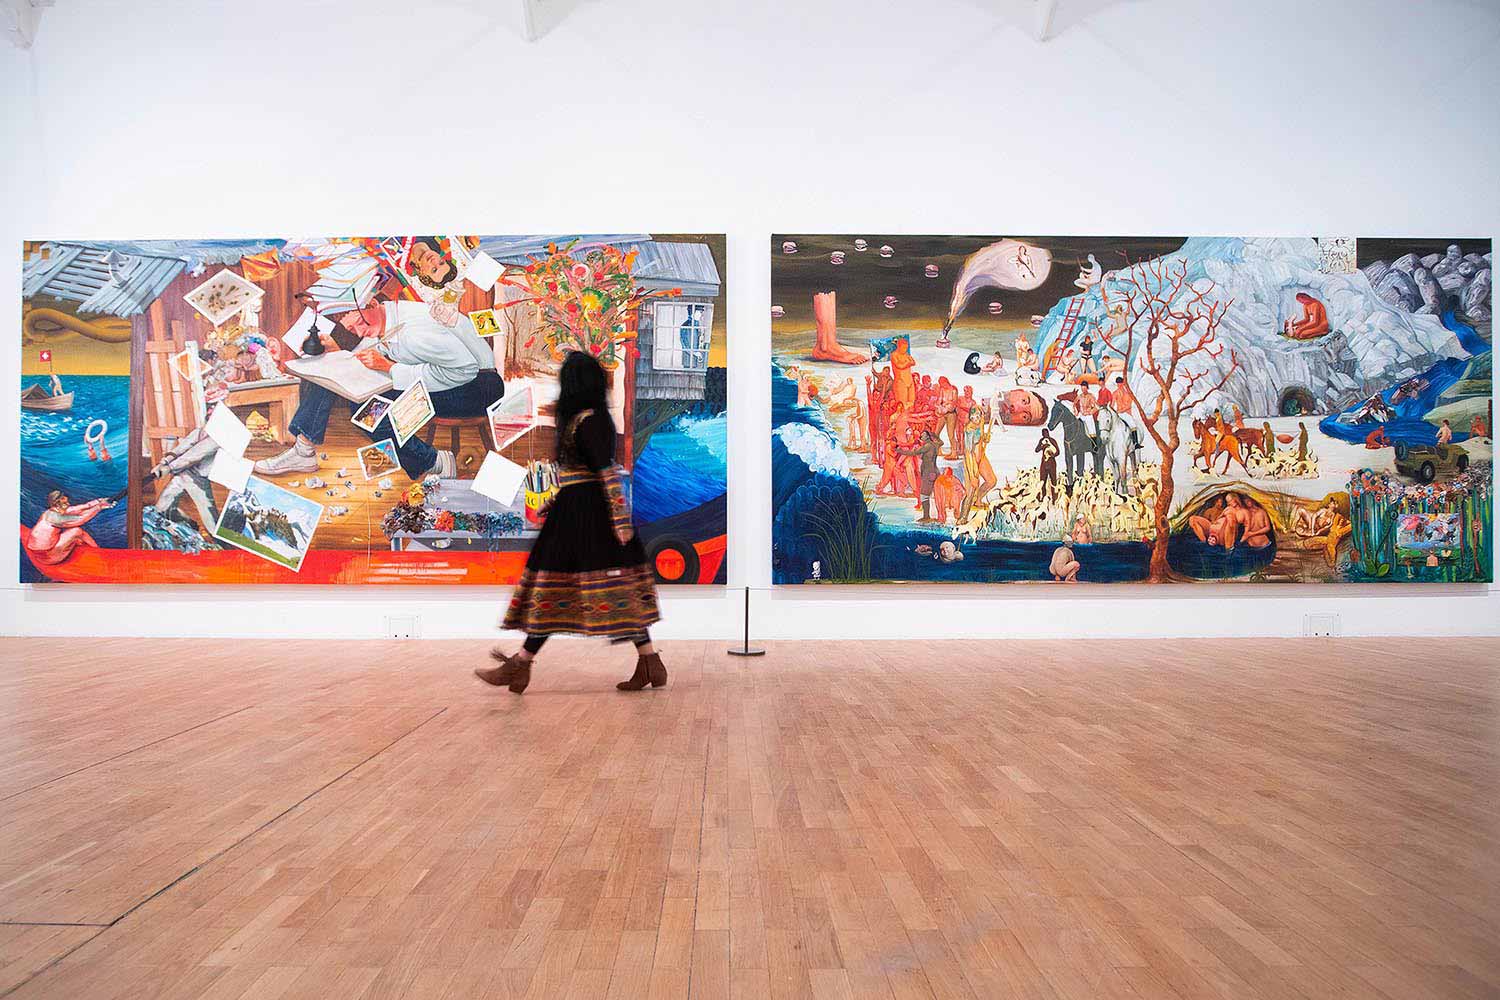
Photo of The Whitechapel Gallery from web

Each of these cities beckons with its own unique artistic treasures, offering a captivating blend of history, innovation, and cultural richness. Whether you seek classical masterpieces, avant-garde expressions, or a fusion of both, these cities promise an unforgettable artistic odyssey.

So, set forth on this art-filled adventure, let your curiosity be your guide, and immerse yourself in the beauty that these cities offer to art aficionados and adventurers alike.


Come with us to travel the world of art!


1ea8ee5e9654782d980bbe068f63d9b8

Abstract art is so diverse that it seems almost impossible to define and describe – which is why it brings so much freedom and happiness!

Everything is extremely individual in abstract art, from the methods and shapes to art forms. However, there are two main abstract movements that we can distinguish. 

In one, the artworks are based on the lines, colours, shapes or light, without being tied to or inspired by any specific, real object. The key thing here is the content, the message of the entire piece. It can be hard to find, but sometimes, with the help of a caption, one can better understand the meaning and even find it in the painting.

The other abstract art movement is based on reality, but it doesn’t depict it realistically – instead, the artist presents the viewer with a very simplified version, hinting at the object with representations of some of its features rather than depicting it.

Therefore it is obvious that each abstract artwork is met with a variety of opinions, often as different as can be. An original approach, balance, but also disparateness, simplicity or complicatedness – all those things can be and are valued in abstract art. The saying that the sky’s the limit is especially true here.

However, you still need an idea, a message, to create a captivating abstract artwork, since the message is essentially the most important part of abstract art! Your job is to create and explore new, hidden horizons and present them to the viewer.

Now, since great ideas and creativity are skills that you can practice and even colour splashes can be done professionally, you can learn abstract art with us too! Come to Draw Planet to enjoy beautiful, vibrant colours and creative freedom as you learn from the best of the best!


How to start digital painting

18. February 2022

wacom-intuos-pro-andra-dieckmann

For many artists, there comes a moment in their lives when they decide to give digital painting a go, and even though the internet is full of tutorials and other educational materials on the topic, many are still at a loss when it comes to actually taking the first steps. That’s why we decided to compile a small entry  of FAQs on digital painting for beginners and experienced traditional artists alike who want to make the transition into the world of digital art.

1) Do I need to re-learn drawing?

Don’t worry, you don’t. The basic theories on drawing, colour and composition always apply, regardless of what medium you are using (a brush, a pencil or a tablet). You just need to recognize the specifics of your chosen technique and adapt to them. In this case, it means getting familiar with the user interface of our chosen software and getting used to a tablet.

2) Do I need a drawing tablet?

Using a computer mouse to draw isn’t the best idea, so a drawing tablet will make your life much easier and work much more comfortable. However, the pioneer of computer drawing, Craig Mullins, still uses a mouse to create his impressive artworks.

3) What is a drawing tablet?

Drawing tables come in two types – with an in-built screen or without it. Those with a monitor resemble iPads and other touch screens, however, unlike normal touch screens, they can also detect the pressure you apply to each stroke when you draw. You also need a special stylus pen to use a drawing tablet.

The tablets with a screen can be either connected to a PC, or have graphic software built directly into them which makes them very portable. The big advantage of such tablets is that you are drawing directly on the screen, which makes the creative process closely resemble traditional drawing on paper. The downside here is the price. 

Screen-less tablets are the most common and most popular. You need to look at your PC’s monitor as you draw on the tablet due to their lack of screen. It does feel strange at first and takes a bit of getting used to, but you will adapt faster than you would expect. The biggest advantages of these tables are the comfort, compact size, and much lower price.

The tablets also differ in their workspace size, its sensitivity, connection type (wired or wireless), and other aspects.

4) What software is the best for digital drawing?

This very much depends on your individual preferences and on what features you are looking for in the software. For raster graphics, Adobe Photoshop, Corel Painter or PaintTool SAI are your best bets. For vector graphics, Adobe Illustrator and Corel Draw are good choices. There are also raster programs that are designed to closely mimic traditional art forms like watercolour, oil, or pastels – these allow the user to choose the canvas texture, brush shape, and other parameters. Among these, ArtRage is the most popular. 

5) What’s the difference between raster and vector graphics?

Simply put, raster images are composed of tiny pixels and are resolution-dependent – this type of digital art is rather close to traditional art forms like drawing and painting on paper or canvas. Vector graphics are based on anchor points connected by lines and curves – it’s especially handy for illustrators and designers whose creations are usually rather simple. The big advantage of vector graphics lies in the flexibility and an endless possibility to change the image size without losing any of the quality. 

6) What are the advantages of digital art?

It’s virtually impossible to ruin your work – you can save it as many times as you like, keeping separate saves for different stages of your artwork, so you can always go back as many steps as you like and start again if you are unhappy with how it’s turned out. This means that the possibilities are extremely broad when it comes to moving your artwork to the next stage, adding or changing colour, changing proportions, the canvas size, etc. And let’s not forget about the fact that you can display your artwork on many different devices and make as many identical copies as you like. 

7) What are the downsides?

To print your digital artwork, you need to complete many steps to finalize it and prepare it for printing – colours need to be corrected and many other things need to be addressed to make sure the printed artwork looks like what you see on the monitor. Adding random and unexpected effects or textures is also difficult. In short, creating digital artworks requires one to adapt to certain challenges brought by the digital world.

8) Can you combine traditional and digital art?

Of course you can! You can start your drawing on paper, then scan it and finish with your tablet. Or go the other way around – make a sketch using your favourite software and then transfer it to a real canvas. Using computers to add finishing touches to illustrations drawn on paper has become standard practice these days.

9) What’s the best way to take first steps into digital art?

The most  important thing you need to do right at the start is to determine whether you like and enjoy digital art. Browse the artworks of talented digital artists and see if they stir a desire to create similar artworks in you. If they do, it’s time to get yourself a drawing tablet (according to your preferences and financial means) and choose software that will give you the tools you want.

And then you just need to register for our digital painting course for beginners 😊 If you do that, you don’t need to buy anything – we have plenty of laptops with graphic editors and great Wacom drawing tablets for our students to use (free of charge, of course) and the best teachers to explain and demonstrate everything.


Painting a landscape

17. February 2022

krajina2

If you love nature, being outdoors, enjoying natural scenery AND you also have an interest in painting, then landscape painting is just the right thing for you! So, how does one get started?

First thing we need to get clear is that it’s one of the more difficult fields. Don’t worry though – you’ll do great! The secret is finding the technique that suits you best and giving yourself enough time to learn and improve. You can create amazing paintings with oil, acrylics, or watercolour. And while there are hundreds of books dedicated to each one of those, today we are going to discuss some very basic principles that will help you achieve a good result.

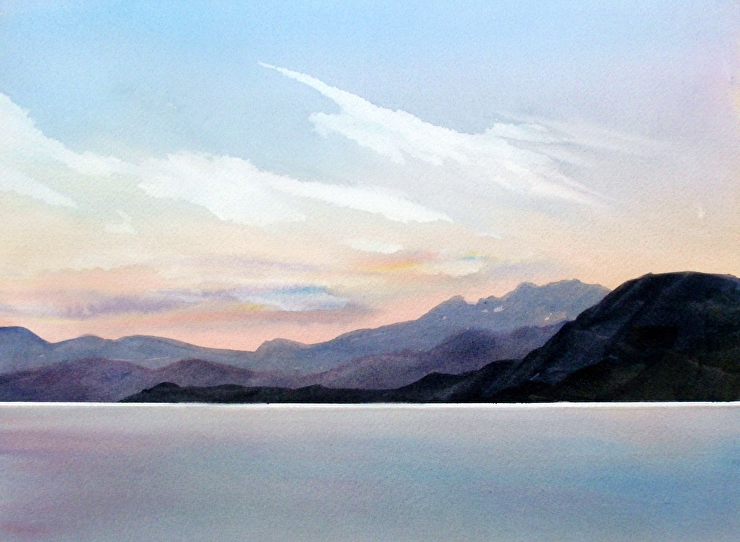
1. Pick a nice landscape for your painting

Keep in mind that not everything that looks good to you in real life will automatically make a good painting. Pick a diverse, intriguing landscape to keep your work interesting and make sure to take a photo of your chosen scene to ensure that it will look good on paper too once it becomes a solitary frame with no surroundings.

2. Take a reference picture

Take a good reference picture for you to copy while your camera is out. It’s much easier to start by copying references than diving straight into open air painting.

3. Sketch a basic outline first

Start with a basic outline, place major elements in the painting, and leave out the details – they will quickly overwhelm you if you start worrying about them right out the door. For now, focus on contrasting areas, their colour schemes, and shapes. You don’t need to painstakingly draw every single tree in the forest – hinting at them with some colour transitions is more than enough.

4. Start adding details when you are happy with the big picture

A flower in the foreground can add that little something that you feel is missing from your painting. This is also a good time to make sure that direct light is where it’s supposed to be and add highlights and shadow where needed.

5. Take another photo

Taking a photo of your work will allow you to look at it from a new perspective and compare it with your reference photo. Of course, it’s not about making a perfect copy – it’s about seeing what could be improved and taking the time to appreciate your work 😊

Landscape painting is a truly captivating affair, with amazing paintings taking you to the most beautiful places and making you feel like you really are there, inside the painting. Don’t be afraid to give it a try too – sign up for our landscape painting course, try different techniques, and learn all you need to know from our amazing, friendly teachers!

64bb426b8ff4e32d348f84553f1d5b74

How to get rid of your fear and finally start your artistic journey 

You get inspired, you want to grab a brush or a pencil and get creative, but then anxiety and fear of failure take over. Sounds familiar?  You are not alone! Many people are afraid to start and if you are one of them, we hope this article helps you break down the barriers that are holding you back and inspires you to finally take the first step – maybe after you’re finished reading? 😊

The good news is, art is like any other trade, and trades can be learnt! Now, every trade comes with its own set of rules and principles and drawing or painting are no different! Think of the process of learning to play an instrument – someone has to explain it first before you can start practising, and it’s just like that with art. 

You can start at any age. It doesn’t matter if you dive in as a child, a teenager, or at 70 years of age. You’ll do great as long as you keep your enthusiasm! Creative activities are also proven to slow down the ageing process, which is why all artists, new and old, always remain young at heart 😊

Creativity is a skill like any other, which means you can practice and get better at it! Grabbing a pen and making a few doodles is enough to give your brain a chance to work differently than it usually does, thus practising your creativity. Pretty cool, right?

It takes time and practice to become good at drawing and believe us when we say that every great artist used to be a “rookie” at some point – we all have to start somewhere! You just need to keep at it, working your way toward improvement. And that means making mistakes and trying again… and again. Your last mistake is your best teacher, and that saying is especially true in art.

And finally, creative activities are good for you! They help us relax and release our emotions, so by discovering your inner artist, you are actually doing something positive for your mental health, improving your empathy and awareness! And what better way to discover that hidden inner artist than by simply drawing, painting, and making art?

Believe in yourself and your talent will surface, trust us! All you need is some practice and a good teacher – and pssst, we don’t want to brag, but ours are really nice, friendly, and amazing! Have no fear and come join us at one of our courses; we have plenty of options for complete beginners! Choose what you like at and become a confident artist!

How to paint beautiful clouds

15. February 2022

9c7d4f138af3bb09e3abae29eeb86da1

There are many cloud painting methods, and in every drawing or painting, clouds are always easy to identify even if they were created by beginner artists. Let’s not forget, however, that clouds are not just random, shapeless blobs in the sky. Keep reading to enhance your cloud-painting skills and improve your future artworks!

Beautiful clouds: five cloud-painting methods
The first cloud related decision arrives rather early, in the composition sketching stage, when you need to decide how much space your clouds will take up in the finished work. Do you want them to just spice up a simple blue sky, or are you going to make it super cloudy and really work on the details of your sky? Once you’ve got that figured out, follow the steps below to make your clouds look amazing.

In this article we will focus on cumulus clouds, the ones we see most often. Cumulus clouds come in many shapes and forms, they are dense, and their colour can range from snow white to menacing dark shades. Just look at our examples.

1. Wide, broad cloud

A cumulus cloud is usually rather voluminous, but still, parts of blue sky tend to peek through here and there. These clouds are nice and dense, and their shape and size vary greatly, so they are fun to draw. To make a wide, broad cumulus cloud look realistic, make sure to add some tattered parts to your sky as well.

Step 1

I decided to keep things simple and went for a simple sheet of watercolour paper and a single blue colour. Start by sketching your “holes” with tattered edges – this is the sky peeking through the clouds. Don’t put too much pressure on the pencil to keep the lines light – you will need to erase them or hide them later. 

Using watercolour, make a wide, smudgy cloud, using wet paper and filling your “holes” with light strokes of blue colour. Then, leave your paper (or at least the sky part) to dry for 30 minutes.

Step 2

Believe it or not, you’re just one step away from the finale! Add more colour to the blue spots you made in the previous step. As the paper was drying, the blue colour probably hid the pencil outlines, which is great – your clouds will look natural and undisturbed by anything that shouldn’t be there. 

Now apply another uneven layer of blue to a wet paper and watch it spread, gathering here in there. This is a great effect that we need and will use in our favour. Keep making your blue more saturated until you are happy with the result. And that’s it, you’re done!

2. Voluminous cloud
This is the most common type of cumulus cloud. They glide smoothly across the sky as we try to find familiar items and figures in their shapes. And the good thing about them is that they are very simple to draw.

Step 1
Draw a curved oval or circle shape. I like to give my clouds defined edges when working on illustrations for children’s books. Keep in mind that this is an outline, a sketch, so don’t put too much pressure on the pencil – you will need to erase these pencil lines later. Add a couple of lines inside the cloud’s body, making them look like small hills.

Step 2
Wet the paper around the cloud, keeping the cloud itself completely dry. Paint the sky blue.

Step 3
Only start working on your cloud once the sky around has dried completely. To add depth, emphasize the convex parts of the cloud with some grey (number 1 in the picture below). Add some wetness to slightly grey the areas around the “hills” inside your cloud and clean the edges with your brush (number 2 in the picture below).

3. The WOW cloud
This is the type of cloud you see when the weather changes suddenly, with fluffy white “hills” breaking out from the cloud.

Step 1
Make an outline of your cloud, just like in the previous example. This time place the “hills” above one another and some to the inside and around the edges of the cloud too.

Step 2
Wet the entire sky area. You can decide to keep the cloud itself a bit muted to make the picture more interesting (number 1 in the picture below). 

To create volume, I made the colour more saturated at the tops of the “hills” – another way to achieve a three-dimensional effect. 

Cirrus clouds can be seen when the weather is good, they are light and fly high in the sky. Their colour is a misty white, with spots and the structure resembling marble or sea waves. There are two different approaches to drawing them.
Blue on white
Wet the sky and a couple of blue curls, then let the paper dry. Repeat this twice to give the colour some volume and create soft edges, and don’t worry about any hard edges that might be there as a result of paper drying unevenly – they will fit into the picture nicely.

White on blue
If you choose this method, you will be applying white paint to a blue sky.

In this picture, you can see an example of this method – I painted the sky blue, let it dry, then mixed some white gouache with water and applied a few light strokes. Then, I wet my brush again to soften the edges that were too hard. And that’s all there is to it! You can even use white pastel instead of paint for this method.


Final tip – don’t limit yourself to one medium – experiment! These tips will all work for other techniques as well; just look at the charcoal drawing of a cloud below.

And if you are intrigued by watercolour, come discover its secrets with us and join our watercolour course for beginners!


Acrylics vs oil paint

15. February 2022

4e46301e22f82fb57002c2d0147a3472

Acrylics and oil paints are the most common paints in art.

The key difference lies in their chemical composition – while acrylics are synthetic and contain water, oil paints are composed of natural ingredients and their manufacturing involves dissolving the pigment in oil.

With that being said, many contemporary artists use both of them, often combining acrylics and oil paints in the same painting! In such cases, acrylics are used for a base and oils come into play to add surface details, a method that doesn’t require the artist to wait for the underpainting to dry completely. 

Let’s briefly go over the key properties of these two types of paints.

Acrylics are water-based and made with synthetic materials and they darken slightly once dry. 

Oil paints are made with natural oils (with a synthetic drying oil being used sometimes as well) and pigments. They maintain colour well after drying but require special canvas preparation before they can be used.

If you want to get more familiar with acrylics or oil paints, come try one of our courses! Our amazing teachers will teach you to work with them properly and share some tips and tricks to help you achieve amazing results. We look forward to seeing you!

Top 5 techniques in art

14. February 2022

442d08fcf67829dc95f64f112908c11c

There are plenty of various techniques in art – some are traditional, some are non-traditional, and some could be described as innovative, even. In general, an artistic technique is characterized not just by the materials used, but also by how they are used and applied. Length and direction of strokes, their brightness, the colour mixing method – all these factors are important, and they are also very individual, allowing each artist to create their own style. Still, there are some main techniques defined by the materials used to produce a resulting artwork. The most famous and the most popular techniques include pencil drawing, pastel drawing, watercolour painting, and oil painting. 

Pencil drawing is the simplest of them and it’s where most artists begin. Pencil drawing doesn’t require any special additional skills, and often pencil drawings serve as a preparatory stage for other techniques. However, there are still things to master in pencil drawing, like realism and precision or the secrets of hatching and shading.

Pastels require a rough surface with enough tooth and texture and allow you to both paint and draw with them – that means you can smudge the pastel to create a seamless layer over a larger area (painting) or use it to apply individual strokes (drawing). Pastels tend to look especially nice on dark backgrounds, which is why toned paper is often used for pastel work. 

Watercolour technique is a bit more complicated, and to many people it remains mysterious, perhaps even misunderstood. Its name comes from the Latin word for water – aqua, and the artist’s ability to control water mixed with colour determines how good they will be with watercolours. The paint itself is fluid and transparent, and very receptive to every move of the brush. Despite being sometimes misunderstood, watercolours are very popular with many great artists.

When it comes to oil painting, there are two distinct approaches: with or without underpainting. The first approach requires some rather complicated preparations, although there are no dogmatic rules when it comes to working with oil paint. The best thing you can do is to try them out and decide what works for you, and don’t get discouraged – even a non-professional artist can handle oil paint.

Recently, a new technique appeared and quickly gained popularity – digital drawing, with artists using drawing tablets and special stylus pens. This is great for both beginners and experts, and there are plenty of specialized programs that are designed to help both adults and children master digital art.

Whatever technique you decide to choose to develop and show off your creative abilities, don’t forget that only practice makes perfect. And for those whose heads are spinning with all the options to choose from there is also a solution – come to our drawing and painting course for beginners and let one of our amazing teachers guide you as you try your hand at all the most popular techniques to discover which one suits you best!


Painting sky with watercolours

13. February 2022

3-7-670×605

Sky is a funny thing – it’s ever changing, taking on countless shapes and colours, and playing different roles in paintings too – it can be your magnificent lead, or a humble extra.

Today we are here to teach you how to paint a beautiful sky and clouds using watercolours with a simple, step by step guide.

But first, we have some useful tips to share:

  1. Use multiple colours in your sky. Don’t limit yourself to blues – use reds and yellows as well to help balance the warm and cool tones.
  2. When using the “wet on wet” technique to paint clouds, keep in mind that the colours will lighten as they dry.
  3. Keep in mind that the closer you go to the horizon, the warmer and lighter the sky appears to be.
  4. Don’t forget about perspective when painting clouds and other three-dimensional objects and add highlights and shadows to match the direction the light is coming from. 
  5. The clouds will look more realistic if you combine sharp and soft contours. 

Now let’s get to work!

Step 1

Wet the paper and wait for it to absorb some of the water. A wet but not glossy surface is ideal.

Now use some yellow (diluted with water) to make a few large brush strokes outlining the position of the clouds. Drawing them with a pencil would have been probably easier, but the empty canvas leaves a lot of space for improvisation. If you do decide to outline them in pencil, try to keep the lines as light as possible.

You can also use watercolour pencils to outline the clouds – this way, any lines you draw will disappear as soon as you cover them with paint.

Step 2

Grab some cobalt blue and start filling in the space above the clouds. Use the flat edge of the brush to keep the strokes light and natural. 

Pay attention to your paper – if it’s too dry, the result will look too hard and sharp. Don’t worry, however – you can always use a wet brush to soften things and blur any sharp transitions.

Step 3

Continue painting the blue sky, moving under the clouds and using more diluted paint to represent the shapes of clouds far away on the horizon.

Step 4.
Now, while the paper is still wet where the clouds are, you can add some shadows with a few light strokes, mixing cobalt blue and cadmium red together to achieve a darker, purplish shade.

Step 5.

Keep adding shadows and softening the outlines using the flat side of the brush. Use swift, broad strokes to cover the remaining sky areas with a mix of cobalt blue and Naples yellow.

Step 6.
Once the sky is finished, add some details to the foreground to make the painting look finished and complete.

That’s it – just look at that pretty landscape painting you just made! If you enjoyed the process and want to learn more about drawing and painting landscapes and nature, we invite you to join our landscape painting course and see what you can do with coloured pencils, pastels, watercolours, and oil paints!

Painting on fabric

13. February 2022

xADK5QC0ZAs

Painting on fabric is a great way to breathe new life to an old, plain t-shirt, boring tank top, or any other piece of clothing! Mastering this technique will allow you to easily transfer your ideas to any fabric and create unique pieces for your wardrobe or your home décor. Follow our tutorial to learn how to create your drawing, transfer it to any fabric, and bring it to life!

Fabric paints

Acrylic, polymer-based paints are the best choice for fabric painting. Their pigments don’t actually go through the fabric – instead, they coat with a “protective layer”, making the fabric structure denser and less elastic. 

Paint will make any fabric vibrant, colourful, and unique. Acrylics have an added bonus here – they are waterproof!


Why choose acrylics

Acrylics really are the best choice for painting on fabric – if you don’t believe us, just look at how popular they are among enthusiasts and professionals alike. So what makes them so great?

– Wide range and availability
– Safety and ease of use
– Option to use water to dilute them
– Water resistance, detergent resistance

Acrylics are also easy to mix, allowing the artist to experiment with new, original shades. Setting a layer of acrylic paint is easy as well – all you need is a warm (not too hot!) iron.

Acrylics can be used on clothes, but also shoes, purses, or other items – for instance, you can decorate your own umbrella!

Paint manufacturers usually indicate what types of fabric are suitable for use with the paint:

If the package says “silk”, the pigment is designed for painting on soft, thin fabrics like silk, batiste or chiffon. 

A label that reads “Textile” means you can paint on denser fabric, leather, velvet, and suede. 

On a dense fabric, an acrylic stencil can look very nice as well, with the fabric’s density allowing for clearly defined edges and vibrant colours.


Preparation
Before you start painting, take time to prepare your fabric properly and carefully by submerging it into cold water for about an hour and then slightly stretching it. Rinse with clean water, then let your fabric dry and finish preparations by ironing it.

If you are using a thin fabric like silk or batiste, stretch it on a wooden frame and let it dry completely. If you want to work on a piece of clothing it is best to separate the layers (like front and back) with a piece of cardboard or thick paper.

Painting techniques
There are certain rules you should keep in mind when applying the paint:

Make sure to put an impermeable foil or wax paper under the fabric you are painting on to protect your desk (or whatever surface you are using to work).
If you are using a stencil or pattern, work the way you would with a colouring picture for children. The only difference is that when applying acrylics in layers, you need to wait for the previous layer to dry completely before adding the next one.
Apply light colours first, then move on to darker shades.
Stick to these simple rules and create your own amazing acrylic-decorated fabric that will last through repeated washing! Find some awesome inspiration and dive right into it. Good luck! 😊

1-2017-Olejomalba-Pokracovani-1-44

Our newsletter!