How to paint beautiful clouds
15. February 2022
There are many cloud painting methods, and in every drawing or painting, clouds are always easy to identify even if they were created by beginner artists. Let’s not forget, however, that clouds are not just random, shapeless blobs in the sky. Keep reading to enhance your cloud-painting skills and improve your future artworks!

Beautiful clouds: five cloud-painting methods
The first cloud related decision arrives rather early, in the composition sketching stage, when you need to decide how much space your clouds will take up in the finished work. Do you want them to just spice up a simple blue sky, or are you going to make it super cloudy and really work on the details of your sky? Once you’ve got that figured out, follow the steps below to make your clouds look amazing.
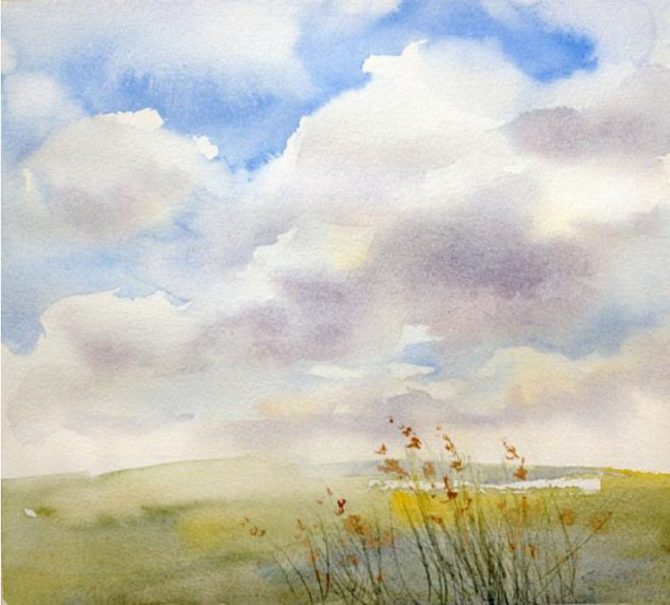
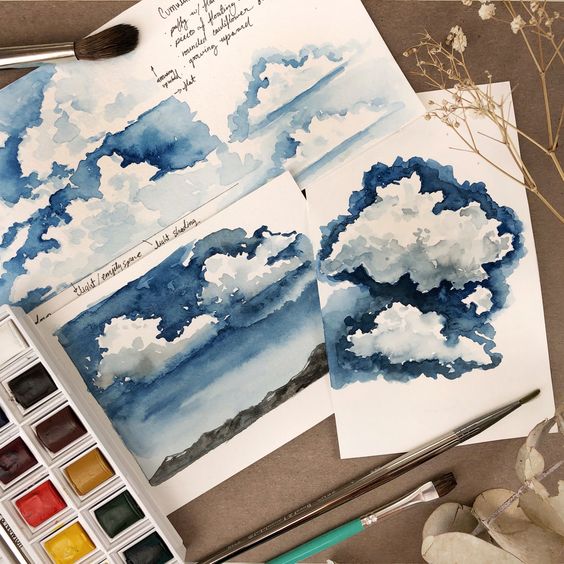
In this article we will focus on cumulus clouds, the ones we see most often. Cumulus clouds come in many shapes and forms, they are dense, and their colour can range from snow white to menacing dark shades. Just look at our examples.
1. Wide, broad cloud
A cumulus cloud is usually rather voluminous, but still, parts of blue sky tend to peek through here and there. These clouds are nice and dense, and their shape and size vary greatly, so they are fun to draw. To make a wide, broad cumulus cloud look realistic, make sure to add some tattered parts to your sky as well.
Step 1
I decided to keep things simple and went for a simple sheet of watercolour paper and a single blue colour. Start by sketching your “holes” with tattered edges – this is the sky peeking through the clouds. Don’t put too much pressure on the pencil to keep the lines light – you will need to erase them or hide them later.
Using watercolour, make a wide, smudgy cloud, using wet paper and filling your “holes” with light strokes of blue colour. Then, leave your paper (or at least the sky part) to dry for 30 minutes.

Step 2
Believe it or not, you’re just one step away from the finale! Add more colour to the blue spots you made in the previous step. As the paper was drying, the blue colour probably hid the pencil outlines, which is great – your clouds will look natural and undisturbed by anything that shouldn’t be there.
Now apply another uneven layer of blue to a wet paper and watch it spread, gathering here in there. This is a great effect that we need and will use in our favour. Keep making your blue more saturated until you are happy with the result. And that’s it, you’re done!

2. Voluminous cloud
This is the most common type of cumulus cloud. They glide smoothly across the sky as we try to find familiar items and figures in their shapes. And the good thing about them is that they are very simple to draw.
Step 1
Draw a curved oval or circle shape. I like to give my clouds defined edges when working on illustrations for children’s books. Keep in mind that this is an outline, a sketch, so don’t put too much pressure on the pencil – you will need to erase these pencil lines later. Add a couple of lines inside the cloud’s body, making them look like small hills.
Step 2
Wet the paper around the cloud, keeping the cloud itself completely dry. Paint the sky blue.
Step 3
Only start working on your cloud once the sky around has dried completely. To add depth, emphasize the convex parts of the cloud with some grey (number 1 in the picture below). Add some wetness to slightly grey the areas around the “hills” inside your cloud and clean the edges with your brush (number 2 in the picture below).

3. The WOW cloud
This is the type of cloud you see when the weather changes suddenly, with fluffy white “hills” breaking out from the cloud.
Step 1
Make an outline of your cloud, just like in the previous example. This time place the “hills” above one another and some to the inside and around the edges of the cloud too.
Step 2
Wet the entire sky area. You can decide to keep the cloud itself a bit muted to make the picture more interesting (number 1 in the picture below).
To create volume, I made the colour more saturated at the tops of the “hills” – another way to achieve a three-dimensional effect.
Cirrus clouds can be seen when the weather is good, they are light and fly high in the sky. Their colour is a misty white, with spots and the structure resembling marble or sea waves. There are two different approaches to drawing them.
Blue on white
Wet the sky and a couple of blue curls, then let the paper dry. Repeat this twice to give the colour some volume and create soft edges, and don’t worry about any hard edges that might be there as a result of paper drying unevenly – they will fit into the picture nicely.

White on blue
If you choose this method, you will be applying white paint to a blue sky.

In this picture, you can see an example of this method – I painted the sky blue, let it dry, then mixed some white gouache with water and applied a few light strokes. Then, I wet my brush again to soften the edges that were too hard. And that’s all there is to it! You can even use white pastel instead of paint for this method.
Final tip – don’t limit yourself to one medium – experiment! These tips will all work for other techniques as well; just look at the charcoal drawing of a cloud below.

And if you are intrigued by watercolour, come discover its secrets with us and join our watercolour course for beginners!