Go to
+44 (0) 330 133 5351
+44 (0) 330 133 5351

#tips

Draw-Planet-Kurz-Foto-Portretu-11

Everyone wants to look great in pictures, but not every photographer knows how to take a good portrait. That’s why we put together a list of 12 tips on various aspects of photography to help you take better portraits, from lighting to lenses. Make your portraits look amazing!

Use natural lighting


If you are working inside, have your model sit close to a big window – diffused light smooths out hard shadows and creates a more attractive image (unless the light is shining directly into the window). Have your model turn their face toward the light – it’s important to make sure that the face isn’t hidden in the shadow. Make sure to turn off all artificial light as well, otherwise there will be a yellow tint to your pictures.

Don’t take pictures in bright, direct sunlight


Working with bright sunlight is extremely difficult – your model will probably tend to squint, and there will be ugly, hard shadows on their face too (see pictures above). It is much easier to take pictures outside when it’s overcast, or when the sun is lower. If you still decide to take pictures on a sunny day, make sure to pick a shaded spot. 

Master hard light

If you are taking your pictures on a bright, sunny day and there is no source of shade anywhere, use diffusers to soften the light. Diffusers are translucent and they come in a variety of shapes and sizes. Foldable oval diffusers are the best option – they are easy to install and transport. In the left picture, the diffuser was placed at an angle above the model’s head. You can also make a diffuser at home using white paper or white cloth. 

Use low aperture

Well-known advice for portraits is using a low aperture to create a blurry background and bring more focus to your subject. Many DSLR and non-DSLR cameras will allow you to manually adjust the aperture (f). The lower the number, the bigger the lens opening, and therefore more light coming through and reaching the sensor. The higher the f number, the smaller amount of light can enter the lens. You can achieve a similar effect using your phone’s camera too – look for portrait mode on an iPhone and for Selective focus options on Samsung phones.

Avoid wide-angle lenses


Taking a portrait with a wide-angle lens can distort your subject, making it look funny. So, if you aren’t looking to add a surreal effect to your photos, make sure to use a lens with a focal length above 50mm, unless you are taking your pictures from several meters away (to minimize the distortion).

Use reflector panels


Using a reflector panel will significantly improve pictures taken in natural light. Just like diffusers, they come in a variety of shapes and sizes. They are also cheap and easy to transport, and you can even use a white surface or aluminium foil as a makeshift reflector panel.
The left picture shows how a well-placed reflector helps soften the shadows on the model’s face (in our case, the reflector was above her head). Also notice the spark in her eye created by the reflected light!

Use a telephoto lens

If you set a low aperture but your background remains sharp and unblurred, the problem is most likely caused by the focal length being too short. Telephoto lenses are actually great for portraits thanks to their ability to compress the space and make the background blur more intense. The higher the focal length, the blurrier the background. 

Use an external flash

Using your camera’s inbuilt flash isn’t the best option for portrait photography since the flash creates a sharp, direct light that makes photos look flat and dull. If you want to use artificial light, get a flash that can be used separately from the camera. The majority of DSLR cameras are compatible with external flashes that can also be connected remotely, with a cable.

You can also keep the flash on the camera but instead of pointing it directly at your model, point it towards the wall or the ceiling – the reflected light will be much softer and better for portraits. 

Don’t forget the surroundings 

Placing your model in a good, interesting spot is a great way to add depth to your photo – both literally and figuratively. Think about what kind of environment would be the best fit for your subject’s personality. Street graffiti will work great for a street artist, while a natural backdrop will be a good fit for fans of the outdoors. Make sure there are no wires, fences, or other unwanted obstacles in the viewfinder before you take a photo.

Help your model feel relaxed

Most people are shy and don’t feel comfortable in front of the camera. As a photographer, you need to be able to help them relax. Tell a joke (be careful not to touch a sensitive subject), put on some music they like or offer them a refreshing drink.

Take pictures outside

The best and the most interesting portraits come to life when your models are in a familiar environment, allowing you to capture them during their daily life. It’s this type of portrait that has made Stephen McCurry, Mary Ellen Mark, and Lauren Greenfield famous. Try to just go with the flow of whatever activity you are doing instead of getting people to pose for every photo; try capturing people’s portraits when they are at home or doing something they love

Choose interesting models

You will probably agree that boring people make for boring models and boring pictures. If you want to expand your portfolio, ask your photogenic friends, relatives or acquaintances to pose for you! And if you are more into documentary photography, pay attention to interesting characters you meet when you travel or on the streets of your hometown.

Want to learn more? Join our new photography course to get professional guidance and many, many more amazing photography tips and tricks! 


thought-catalog-505eectW54k-unsplash

Creativity and creative thinking have become quite the buzz words recently. But what do they even mean, and can you train yourself to improve them? Many believe that creativity and things like hard work, self-organization, and order simply can’t coexist. However, they are quite wrong – creative thinkers are experienced, versatile, and skilled people, and to become such a person requires hard work, dedication, and responsibility. Therefore, creativity combines thinking, skills, experience, an open mind, and the ability to learn regardless of age or context. 

Creativity means an open mind and open heart, something everyone can practice and improve with the right exercises and tools, keeping in mind that every exercise should help you get rid of narrow-mindedness and change your normal way of thinking. Here are some of our favourite exercises to develop creativity.

1.Grab an everyday item and try to come up with as many non-standard uses for it as you can. Let’s take a spoon, for instance. It’s a great utensil for sure, but it could also become a lamp, an art piece, or a marker for your vegetable patch.

2. Shake it up from time to time and try doing things differently! For instance, if you are used to having lunch at the same place every day, try a different restaurant for a change.

3. Try a different cuisine, walk home using a different route than you normally would, etc. Our life is full of small habits that trap us in our little boxes, if you think about it, so try opening this box of yours and stepping out and beyond it.

4. If you are facing any kind of a problem, don’t try solving it the usual way. People often tend to have the “if it ain’t broke don’t fix it” mentality, but it was Einstein who said that madness is doing the same thing expecting different results. So next time you have to tackle a problem, don’t start working on a solution until you can come up with at least one alternative approach.

5. Engaging in any sort of creative activity is obviously a wonderful way to develop your creative thinking. It doesn’t matter what you do as long as you enjoy it. You can draw, write poetry, compose song lyrics, or perhaps learn to play an instrument. The important thing is that getting great at whatever you choose is not the point – the point is to experience something new, to gain a new perspective, to help your brain start working differently. Because what is creativity if not a disruption of thinking and customary habits, actions, thoughts, and life flow?

6. Travelling or starting a new sport are also great for creativity. The general rule is that any new place or circumstance will greatly broaden your horizons and enhance your creativity. Just make sure to always travel with an open mind and open heart so you don’t miss anything new and exciting!

7. Work on your associative thinking and teach your brain to make dots between seemingly incoherent concepts to improve your memory and train your brain’s skill to combine different things. Not everyone is capable of making such associations right away, so use these tips and methods to work on your creativity, teach your brain to push boundaries and limits, question things and come up with unique solutions.

By the way, getting into drawing is also an amazing way to amp your creativity 😊 At Draw Planet, we have a wide selection of courses covering anything from classic drawing and painting all the way to computer graphics, so everyone can find something they like. Come join us and grow through your art!


df56fd7a619a70f4fff1281e7eee664a

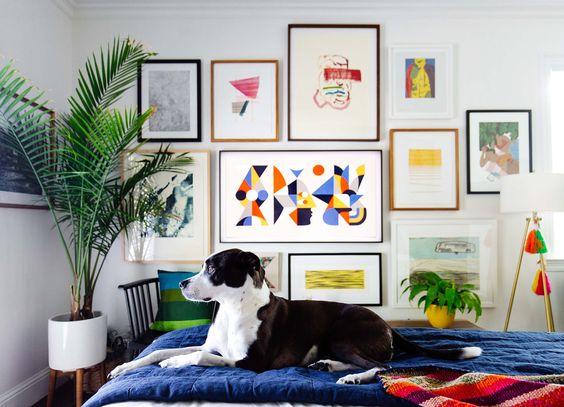
If you want to get some useful tips on how to hang paintings, how to arrange them into one coherent composition, and how high you should hang them, keep reading!

Here are our tips on decorating your interior with pictures and paintings:

1. Arrange your pictures on the floor or against the wall before you start hammering in nails – this will help you see the whole composition and choose the final layout.

2. Determine the surface that will be taken up by the finished arrangement and keep it under 2/3 of the wall’s surface.
 
3. To make your pictures truly stand out, hang them on a light wall – it can be completely white, painted in pastel shades or covered with light wallpaper.

4. Horizontal pictures will make the wall look longer while vertical paintings will visually lift the ceiling.

5. It’s important to hang your pictures at the right height to make sure they are easy to see. Use the imaginary line passing right through the middle of a picture as a guide. The classic “museum style” approach is to hang the picture at 152 cm from the floor to this imaginary midline.

6. Consider hanging the pictures lower in the kitchen and the dining room, since you will likely be sitting at a table, not standing when you observe them.

7. If you don’t plan on simply placing your picture on the floor and letting it lean against the wall, don’t hang anything below 60 cm.

Interior picture layout: three basic methods
1. The symmetric approach


Symmetry is very harmonic, bringing a sense of order and allowing the viewer to comfortably take in the entire composition and making the home feel cosier. The pictures are hung to create a mirror image on every side of an imaginary midline. The bottom line can be aligned at the same height, or at a different height too – in that case, the pictures are hung on an imaginary horizontal midline.

2. Top or bottom alignment

You can choose to align pictures either at the top or the bottom line – you’ll be surprised how good it looks, giving the composition an anchoring point and a sense of stability and order.

3. The asymmetric approach


Asymmetry brings in a live dynamic sense, grabs the viewers attention and pulls everyone’s eyes to the wall and the composition. It also allows you to combine different picture sizes and formats, forcing you to think carefully about the entire layout. 

Keep in mind that creating a good asymmetric composition is not easy, requiring a keen sense of composition.


tOGO3-dbBcI

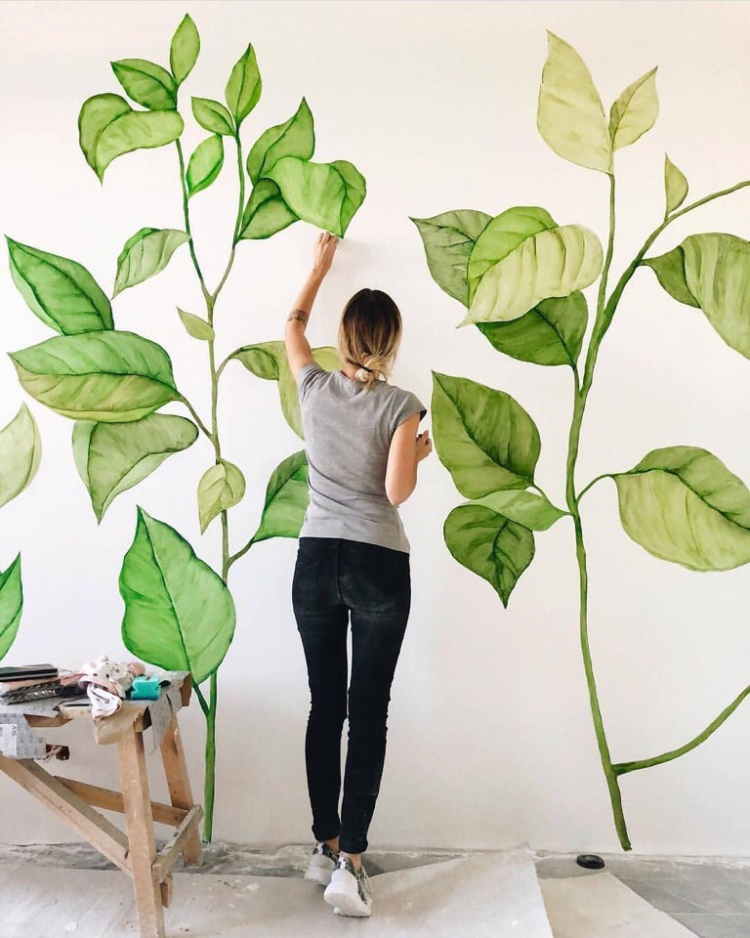
A beautiful, unique interior is something we all dream about, and surely many people have thought at some point – why don’t I paint something awesome on my walls with my own hands? The problem is, you immediately realize that you don’t know how – you’ve never done it before and perhaps you feel too left-handed to tackle something like that by yourself. But then, professional artists and designers are so expensive that ultimately you give up on that dream and slap on some wallpaper because it’s much easier. But what if you decide to fulfil this dream after all?

A wall is not a sketchbook – you don’t draw a random doodle that you just thought of on a wall. Choosing the right wall art image is almost as difficult as creating it – it has to match the style of the room, be in line with the room’s purpose and carry a certain emotion. There can be other purposes to it too, like making the room seem taller or hiding crooked walls. Most often, wall art is seen in children’s rooms because it brings them the most joy, especially when it’s their favourite cartoon characters on cute animals decorating their walls. 

But don’t despair, you can still decorate your wall with your own artwork, even if you aren’t exactly a professional artist!

Step 1. Choose your picture and determine how big it’s going to be. In this guide we assume that you are at the point when you already know where exactly your picture is going to be and why. The internet is overflowing with billions of pictures, but we suggest starting with something on the simple side – don’t attempt to paint a giant flaming dragon just yet.

Step 2. Prepare your wall – experts work on smooth, clean, well-painted surfaces, so take care to smooth out your wall and choose a colour that will work as a background for your wall art.

What kind of paint can you use?

Step 3. Get your supplies: paints, brushes, etc. Get two types of brushes: large flat brushes for big, wide strokes (you can go for natural or synthetic) and small, round brushes for details. Make sure to get  some cups and containers to clean your brushes and mix colours – get the single-use kind if you don’t want to sacrifice your dishes. As for the paints, all experts agree that you should only use matte, water-based acrylics – they are easy to mix and apply and they won’t smudge once dry. Mix white acrylic paint into your colours to achieve the desired shade. To achieve the desired level of liquidity (a consistency resembling sour cream with 15% fat content is ideal), simply add water, but be careful and don’t get too carried away – you could end up with ugly spots on your wall when the paint dries. Some artists like to cover the entire finished painting with an extra layer or two of matte acrylic wall coating just to be sure.

Step 4. Print out 5–10 copies of your template in black and white to create something like a sketch. Choose the background colour carefully – the same colour can look very different on a white or green background, so take care to choose colours that work well together. If your chosen painting contains lots of repeating elements (like leaves), it’s a good idea to make simple stencils before you begin.

Step 5. Now use a pencil to lay down a basic sketch on the wall. Avoid black pencils – they are very hard to erase and tend to leave ugly smudges. A soft coloured pencil is a much better option here since you can correct mistakes simply, with a large soft eraser. The better your sketch, the easier the painting stage will be. People who struggle with spatial orientation can use a grid – draw it on your printed template and on the wall. It will divide the image in smaller pieces, making it easier for you to transfer it from paper to the wall.

Step 6. Grab your acrylics and start painting! Always mix your colours right before you use them since acrylics dry very quickly. Don’t forget to repeat strokes to give your painting a more natural, three-dimensional look; just make sure to let the previous layer dry before going over the same spot again. Hold your brushes perpendicular to the wall. Use small brushes to correct any mistakes and move from the large brushes at the start to small brushes towards the end, adding the smallest details last – this way you can easily create volume, reflecting sun, and other natural effects in your wall art.


That’s everything you need to know to paint your own wall – good luck! And for those who would like to learn more about interiors, we invite you to register for our amazing interior design course where you will learn how to work with a floor plan, how to combine colours or even how to use a computer to create your interior in 3D!

62258331_2368780329835476_3138336799370248192_n

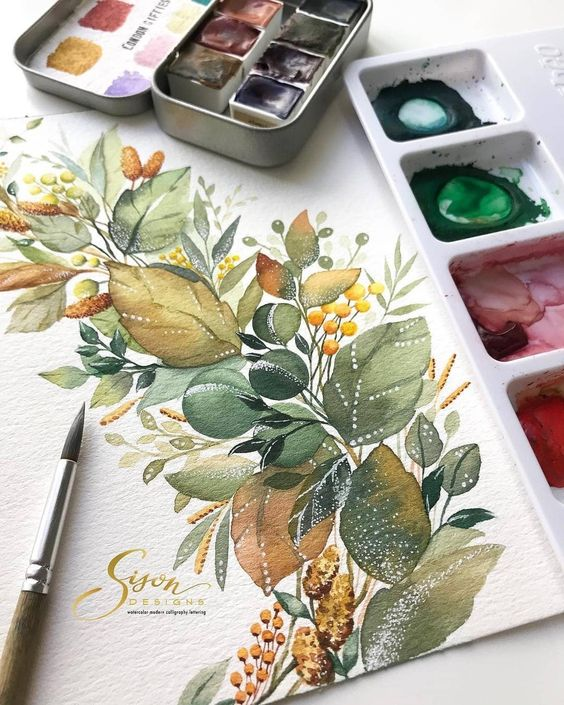
How do people take good photos of their artwork? And how do they publish them online?! Keep reading to learn their secrets!

Being a good artist is not enough these days – you also need to know how to make your art look good online. Photos of your art need to be as good as the artworks themselves to make the best impression on the viewers. Luckily, this article will help you take better pictures and teach you how to post them on social media and get the engagement and audience they deserve. 

Lighting

Good lighting is the number one factor in photographic quality. If you don’t have professional lighting equipment, use daylight to take photos of your artwork. Don’t rely on interior artificial lights – instead, take your picture outside, to the balcony, or at least place it close to a window. Avoid using a flash – it will create a strong reflection that never looks good. 

An overcast afternoon will offer the best possible lighting conditions (outside, of course). It is key that the light hits your artwork at an angle, not directly from above!

Photographing large paintings is a bit more difficult since it is likely that the lighting will be uneven. Luckily, there is a simple trick to help – place a large sheet of white paper next to the side of the painting with less light hitting it. Don’t worry about unwanted items in your frame – you can edit them out later.

You can showcase a picture simply by photographing it, or you can choose to get more creative and create an entire composition with brushes, pencils, paints and other items strewn around your artwork. Look for inspiration online and adapt the ideas that you like to suit your style and work.

Take time to learn to photograph and present your work in an attractive way – trust us, it will pay off! After putting so much effort into your work, it would be a shame to have a sloppy online presentation that doesn’t do it justice. 

Got nothing to present yet? Choose one of our courses and learn to make amazing artworks worthy of online presentation with us!


1-2017-Akvarelova-Ilustrace-1-94

Our newsletter!