Painting a forest landscape: how to paint green trees
6. February 2022
Back to blog
Everyone likes a summer landscape, but for a beginner, this can be a daunting task. However, there is one important trick to keep in mind: it’s in the light that inevitably touches the green of the trees, but most people forget about it and only use two or three colours for all greenery in their landscape, ending up with a rather child-like creation. So, how do you paint a realistic green landscape?
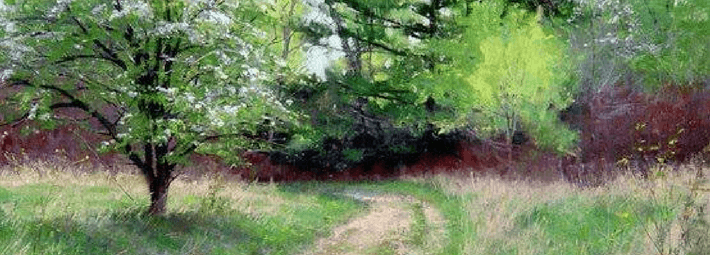
First off, the “green” you see in the scene might actually not be green at all, even dabbling into grey-brown or carmine here and there. Let’s use works by Mark Hanson to demonstrate the principles behind painting green trees. We identified the exact shades in several spots in the painting to see what colours are really at work.

1) The first picture shows clear shades of green that you can create using paints found in every common paint set. The beginners, however, tend to think that there is no mixing involved in these colours, which is a mistake – the bright green colours are actually rather rare in real forests. We also need to consider the painting’s circumstances – it captures the start of summer, with a bit of an overcast. The leaves are still young and at about the same distance from all objects in the painting.

2) In other seasons, however, the brightness steps aside, making space for less vibrant shades and different colours on different trees. At this time of year, you are likely to see different types of young leaves or needles, some dark like pine trees, some in cooler shades, like olive or willow trees. Different wood colours must be kept in mind as well.

3) Bright sunlight changes the painting radically. On an overcast day, the colour appears to be more or less the same across the entire treetop, but when sun comes into play, the colours in the shaded and highlighted areas are vastly different, with the light making the colours vibrant and warm and the shadow dimming and darkening them. In this picture, you can also see that the colours are different due to the distance, with the shadows on more distant trees being brighter and cooler compared to those of their neighbours.

4) The further the trees are from the viewer, the more their colour changes compared to the trees in the foreground, transitioning from green to grey. This is caused by the fog that diffuses the colour and introduces milky shades of blue and purple into the green treetops, and the more distant the object, the more fog between the object and the viewer. Just look at the rich and complex shades in this painting.

5) The colours change even more drastically once more complex lighting conditions come into play, like dusk, sunset, dawn, or darkness of the night. In such cases, all conditions that allow green to be more prominent are gone, and the trees become blue-green, grey, or even red.
Keep in mind that there isn’t a single drop of green in this picture, even though we all know that trees are green. However, our brain is used to green trees, yellow sun, and blue sky, so even when our eyes clearly paint a different picture, the brain still makes us reach for the green paint to make a green tree.
How can you “see” the colours with your mind?
There is a very simple tool that you can use. Grab a small strip of paper or cardboard and make a small hole inside it. Now place the hole over the area the colour of which you need to determine. The paper separating your spot from the rest of the scenery will help you see the colours in the hole clearly.

This little trick is especially useful when you are painting trees that are far away from the viewer – remember, the further they are, the less green they become, it’s just our brain that refuses to see it. Go ahead and try it yourself!
Get a photo of a tree or use your hole in the paper to look out the window. Try first looking at a tree like you normally would, then place your “tool” 30–50 cm away from your eyes and cover one eye with your palm. Use white paper for your “tool” and make sure it’s well-lit to ensure that your measurements are correct. Next time you decide to paint a landscape, you will already have a great method to determine if the colour you see really is green.
Are you a nature lover? Would you like to learn to paint your own amazing landscapes? Sign up for our landscape painting course for beginners and come learn with us!


